03. Build It Bigger - Instructions
Build It Bigger - Instructions
Gradle for Android and Java Final Project
In this project, you will create an app with multiple flavors that uses
multiple libraries and Google Cloud Endpoints. The finished app will consist
of four modules. A Java library that provides jokes, a Google Cloud Endpoints
(GCE) project that serves those jokes, an Android Library containing an
activity for displaying jokes, and an Android app that fetches jokes from the
GCE module and passes them to the Android Library for display.
Why this Project
As Android projects grow in complexity, it becomes necessary to customize the
behavior of the Gradle build tool, allowing automation of repetitive tasks.
Particularly, factoring functionality into libraries and creating product
flavors allow for much bigger projects with minimal added complexity.
What Will I Learn?
You will learn the role of Gradle in building Android Apps and how to use
Gradle to manage apps of increasing complexity. You'll learn to:
- Add free and paid flavors to an app, and set up your build to share code between them
- Factor reusable functionality into a Java library
- Factor reusable Android functionality into an Android library
- Configure a multi project build to compile your libraries and app
- Use the Gradle App Engine plugin to deploy a backend
- Configure an integration test suite that runs against the local App Engine development server
How Do I Complete this Project?
Step 0: Starting Point
This is the starting point for the final project, which is provided to you in
the course repository. It
contains an activity with a banner ad and a button that purports to tell a
joke, but actually just complains. The banner ad was set up following the
instructions here:
https://developers.google.com/mobile-ads-sdk/docs/admob/android/quick-start
You may need to download the Google Repository from the Extras section of the
Android SDK Manager.
You will also notice a folder called backend in the starter code.
It will be used in step 3 below, and you do not need to worry about it for now.
When you can build an deploy this starter code to an emulator, you're ready to
move on.
Step 1: Create a Java library
Your first task is to create a Java library that provides jokes. Create a new
Gradle Java project either using the Android Studio wizard, or by hand. Then
introduce a project dependency between your app and the new Java Library. If
you need review, check out demo 4.01 from the course code.
Make the button display a toast showing a joke retrieved from your Java joke
telling library.
Step 2: Create an Android Library
Create an Android Library containing an Activity that will display a joke
passed to it as an intent extra. Wire up project dependencies so that the
button can now pass the joke from the Java Library to the Android Library.
For review on how to create an Android library, check out demo 4.03. For a
refresher on intent extras, check out;
http://developer.android.com/guide/components/intents-filters.html
Step 3: Setup GCE
This next task will be pretty tricky. Instead of pulling jokes directly from
our Java library, we'll set up a Google Cloud Endpoints development server,
and pull our jokes from there. The starter code already includes the GCE module
in the folder called backend.
Before going ahead you will need to be able to run a local instance of the GCE
server. In order to do that you will have to install the Cloud SDK:
https://cloud.google.com/sdk/docs/
Once installed, you will need to follow the instructions in the Setup Cloud SDK
section at:
https://cloud.google.com/endpoints/docs/frameworks/java/migrating-android
Note: You do not need to follow the rest of steps in the migration guide, only
the Setup Cloud SDK.
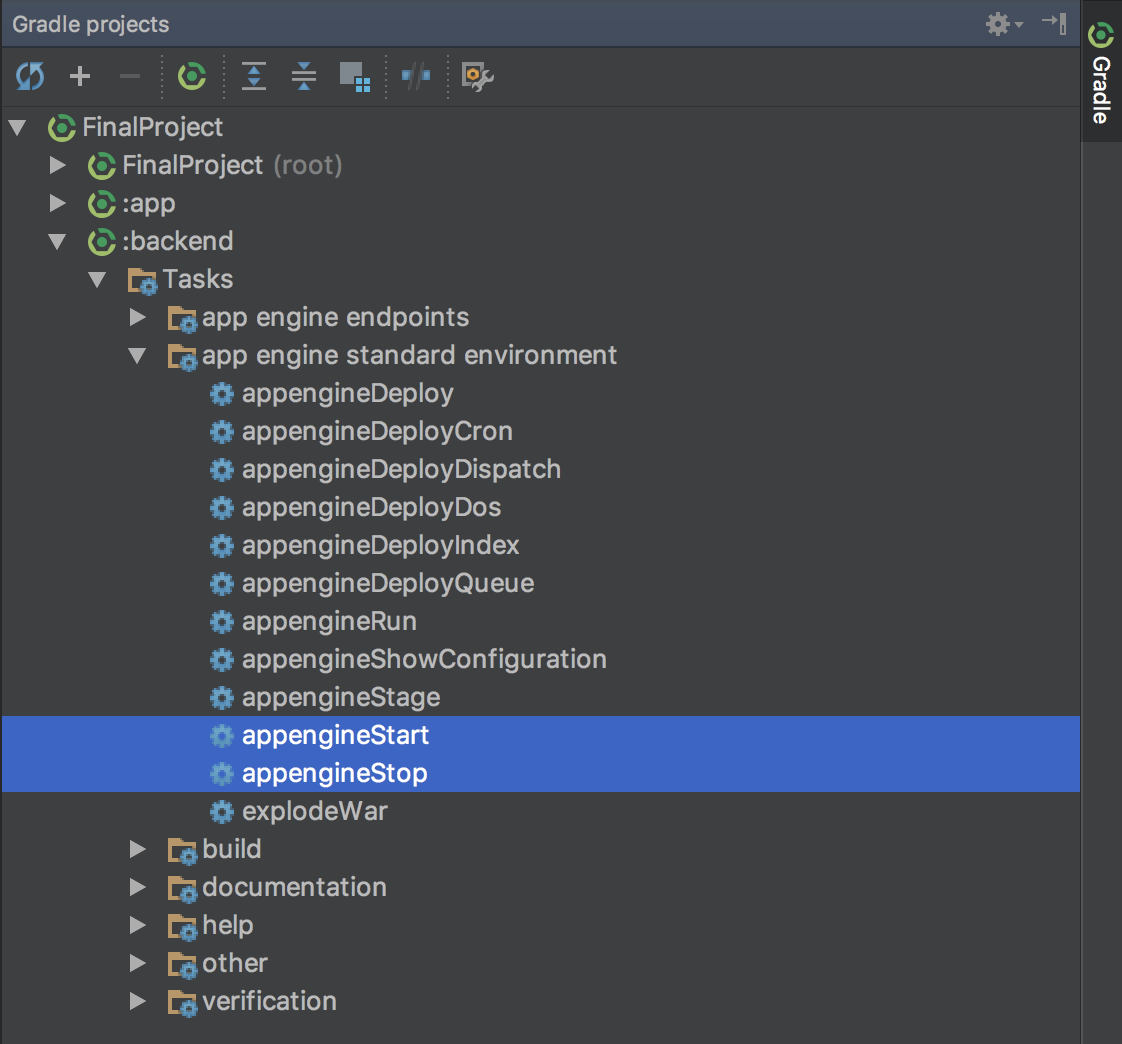
Start or stop your local server by using the gradle tasks as shown in the following
screenshot:
Once your local GCE server is started you should see the following at
localhost:8080
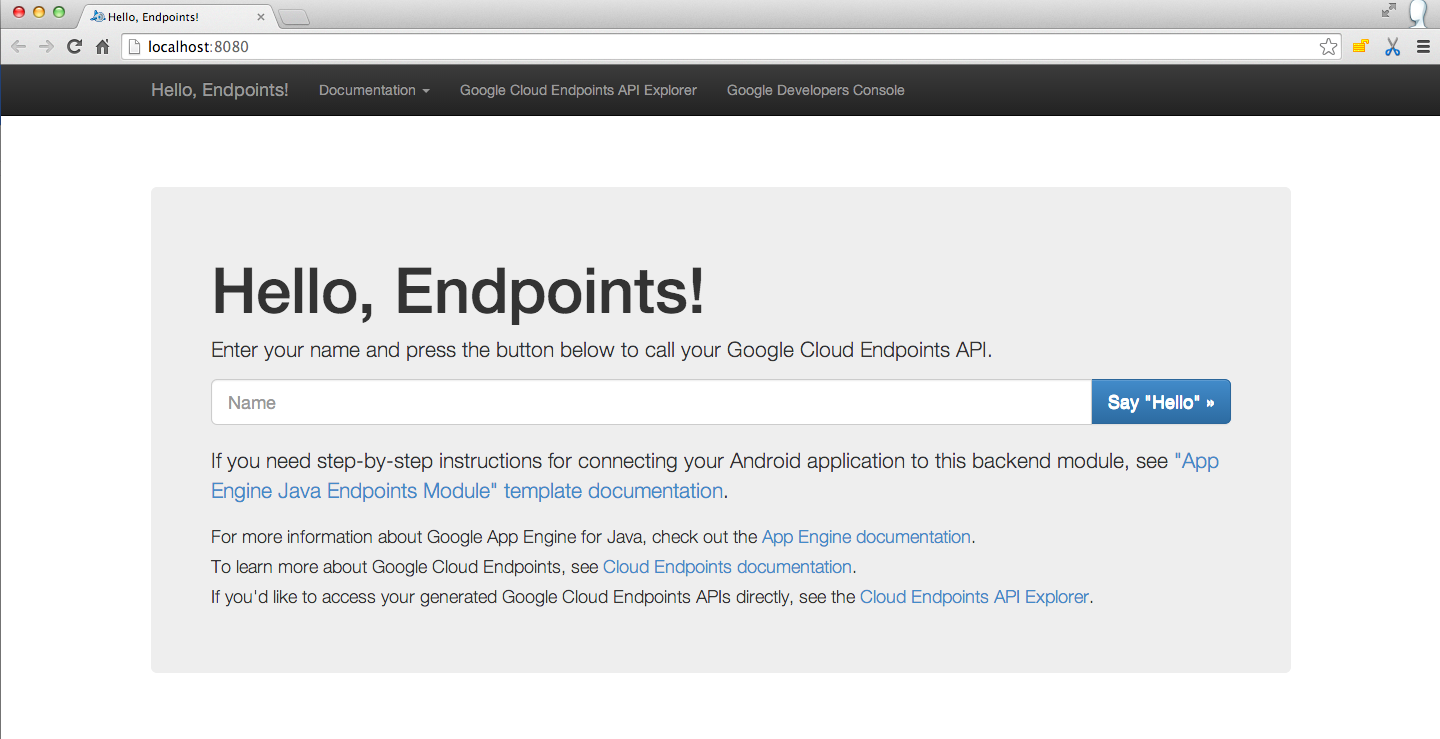
Now you are ready to continue!
Introduce a project dependency between your Java library
and your GCE module, and modify the GCE starter code to pull jokes from your Java library.
Create an AsyncTask to retrieve jokes using the template included in these
instructions.
Make the button kick off a task to retrieve a joke,
then launch the activity from your Android Library to display it.
Step 4: Add Functional Tests
Add code to test that your Async task successfully retrieves a non-empty
string. For a refresher on setting up Android tests, check out demo 4.09.
Step 5: Add a Paid Flavor
Add free and paid product flavors to your app. Remove the ad (and any
dependencies you can) from the paid flavor.
Optional Tasks
For extra practice to make your project stand out, complete the following tasks.
Add Interstitial Ad
Follow these instructions to add an interstitial ad to the free version.
Display the ad after the user hits the button, but before the joke is shown.
https://developers.google.com/mobile-ads-sdk/docs/admob/android/interstitial
Add Loading Indicator
Add a loading indicator that is shown while the joke is being retrieved and
disappears when the joke is ready. The following tutorial is a good place to
start:
http://www.tutorialspoint.com/android/android_loading_spinner.htm
Configure Test Task
To tie it all together, create a Gradle task that:
- Launches the GCE local development server
- Runs all tests
- Shuts the server down again